前回のおさらい
こんにちはプラチナホルダーの長沢です。
前回は Oracle Management Cloud のインスタンス作成まで行いました。
本ビジネスブログの右側の「最新の投稿」の下にある
カテゴリー > [連載]Oracle Management Cloud使ってみました。
からアーカイブ記事が確認できます。
こちらに更新していきますので、宜しくお願いします。
それでは、今回はOracle Management CloudのAgentをインストールを行っていきましょう。
Oracle Management CloudのAgentのインストール
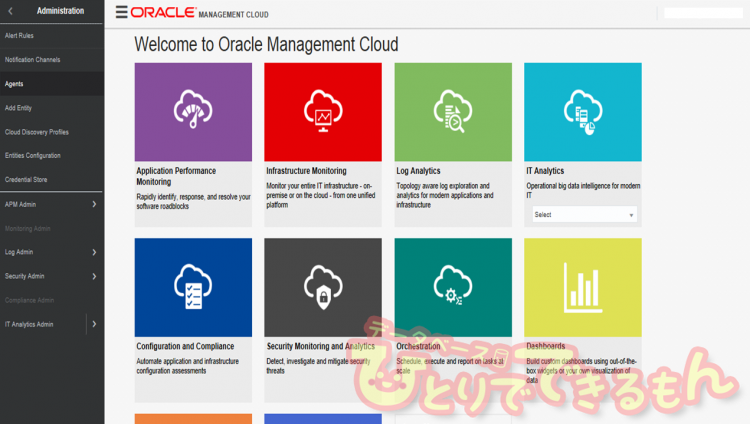
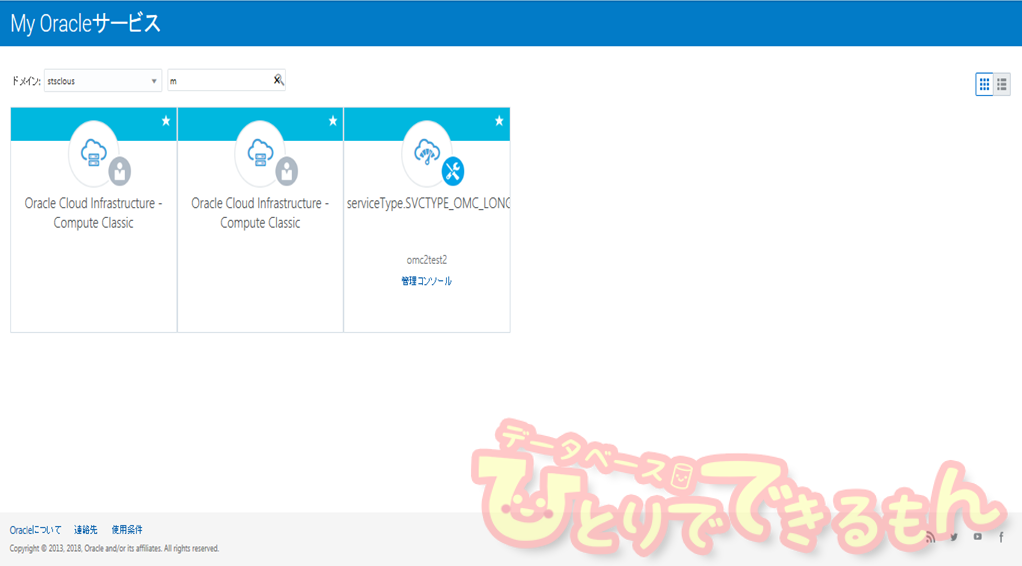
さっそく、Oracle Cloud にサインインし、My Oracleサービスの一覧から「管理コンソール」をクリックします。
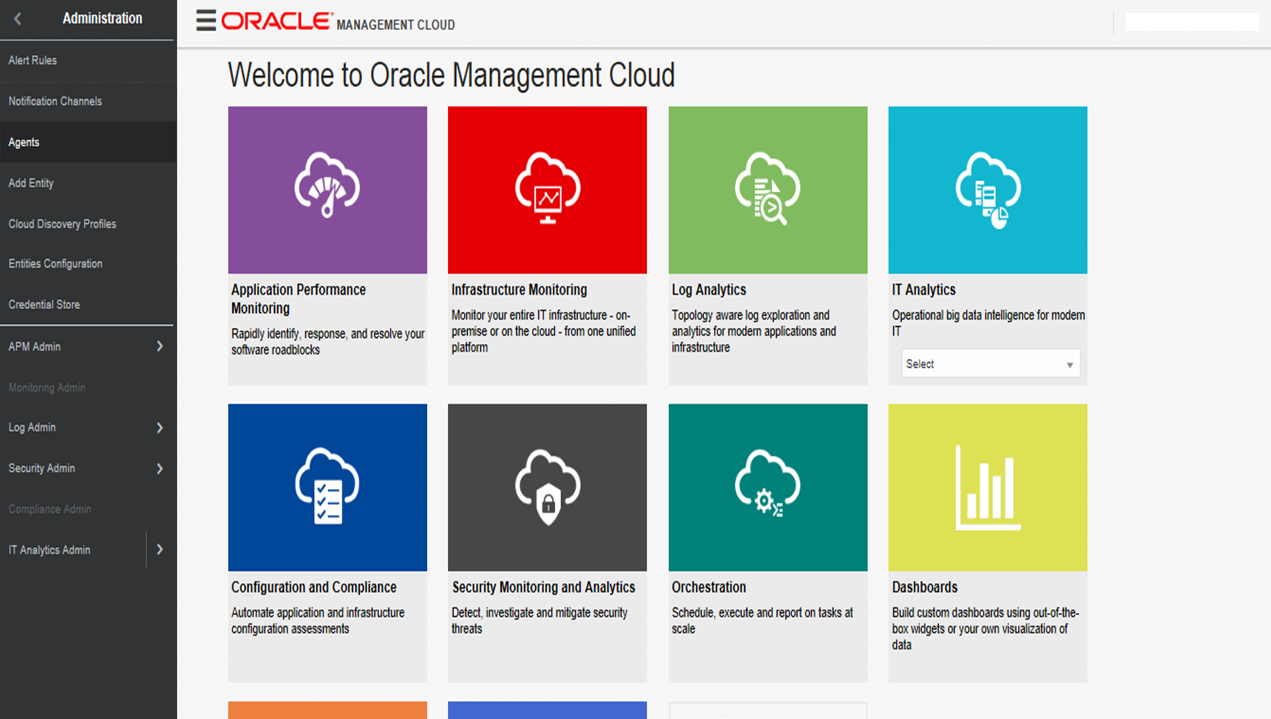
ハンバーガーメニューからAdministration ⇒Agentをクリックします。
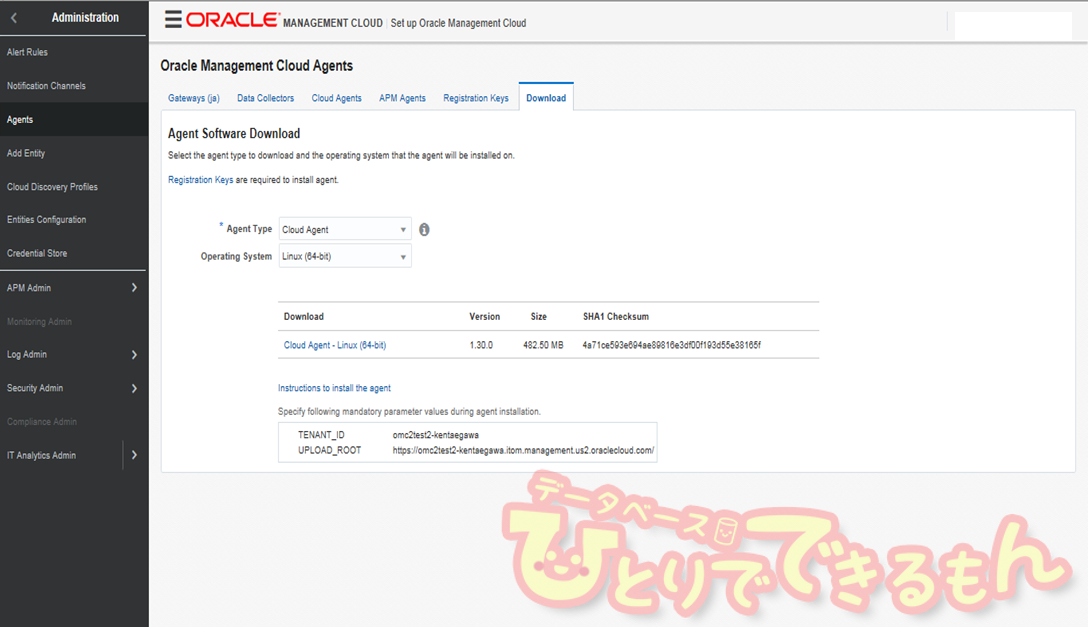
Downloadタブの、インストールするAgentのタイプからCloud Agentを選択し、Operating SystemにはLinux(64-bit)を選択します。
下にエージェントのリンクが表示されるのでクリックしてエージェントのzipファイルをダウンロードします。
また、下に出ている「TENANT_ID」と「UPLOAD_ROOT」もエージェントのインストール時に使うのでメモしておきます。
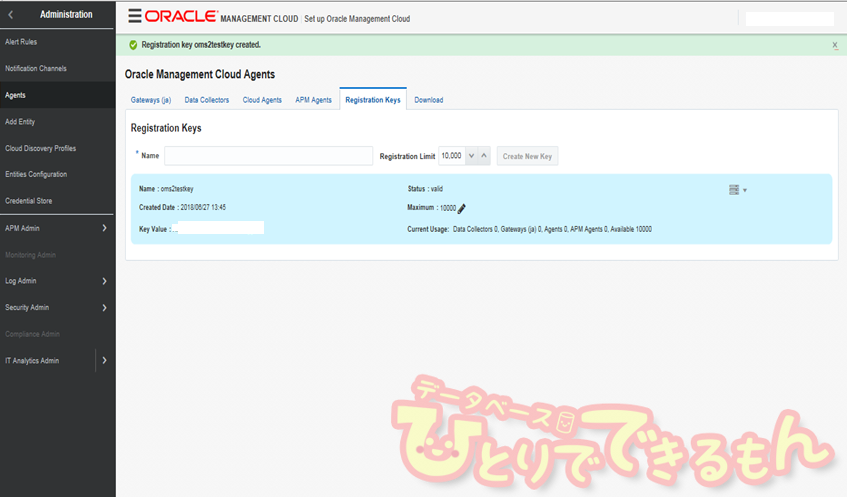
ダウンロード出来たらRegistration Keysのタブを選択し、Registration Keysを作成します。
ここで作成したKey Valueもエージェントのインストール時に使うのでメモしておきます。
インストール用のワークディレクトリを作成し、zipファイルを格納、解凍します。
その後、エージェントインストール用のディレクトリを作成します。
oracle$	mkdir /home/oracle/work
oracle$	scp -p xxx.xxx.xxx.xxx:cloudagent_linux.x64_1.30.0.zip /home/oracle/work
oracle$	cd  /home/oracle/work
oracle$	unzip cloudagent_linux.x64_1.30.0.zip
oracle$	mkdir /u01/app/omcagent
レスポンスファイル(agent.rsp)を編集します。レスポンスファイルはエージェントのzipファイル内に格納されています。
記載する内容は事前に取得したTENANT_ID、UPLOAD_ROOT、AGENT_REGISTRATION_KEYと作成したインストール用のディレクトリパスです。
oracle$	cd  /home/oracle/work
oracle$	vi agent.rsp
TENANT_ID=xxxx
UPLOAD_ROOT=https://xxxxx/
AGENT_REGISTRATION_KEY=xxxx
AGENT_BASE_DIRECTORY=/u01/app/omcagent
インストールを実行します。
oracle$	cd  /home/oracle/work
oracle$	./AgentInstall.sh
–以下はログです--
Unzipping agent software, this may take some time...
Installing Cloud Agent...
Cloud Agent parameter validation started...
Cloud Agent pre-requisite checks started...
Cloud Agent base directory creation started...
Security artifacts download started...
Cloud Agent setup started...
Registering Cloud Agent...
Starting Cloud Agent...
Cloud Agent started.
Cloud Agent installation completed.
Cloud Agent post installation checks started.
Cloud Agent is up and running.
Cloud Agent is communicating to Oracle Management Cloud.
Cloud Agent post installation checks completed.
To start Cloud Agent upon Operating System restart include '/u01/app/omcagent/agent_inst/bin/omcli start agent' in the start-up scripts.
For further details please refer http://www.oracle.com/pls/topic/lookup?ctx=en/cloud/paas/management-cloud&id=agent_service.
インストール完了後、エージェントステータスを確認します。
oracle$	 cd /u01/app/omcagent/agent_inst/bin/
oracle$	./omcli status agent
-- 以下はログです--
ulimit for open file descriptors is currently set to 1024.  It must be atleast 4096
Oracle Management Cloud Agent
Copyright (c) 1996, 2018 Oracle Corporation.  All rights reserved.
---------------------------------------------------------------
Version                : 1.30.0
State Home             : /u01/app/omcagent/agent_inst
Log Directory          : /u01/app/omcagent/agent_inst/sysman/log
Binaries Location      : /u01/app/omcagent/core/1.30.0
Process ID             : 11040
Parent Process ID      : 10997
URL                    : https://db12c2.jp.oracle.com:7282/emd/main/
Started at             : 2018-06-27 15:47:54
Started by user        : oracle
Operating System       : Linux version 3.8.13-68.3.4.el6uek.x86_64 (amd64)
Data Collector enabled : false
Sender Status          : FUNCTIONAL
Gateway Upload Status  : FUNCTIONAL
Last successful upload : 2018-06-27 16:18:51
Last attempted upload  : 2018-06-27 16:18:50
Pending Files (MB)     : 0.01
Pending Files          : 11
Backoff Expiration     : (none)

---------------------------------------------------------------
Agent is Running and Ready
今回はここまで!
次回はいよいよ監査ログの取得設定を行います。
投稿者プロフィール




![【再掲載】[超図解]パーティション化(1/5) パーティション事始め](https://xn--w8j8bac3czf5bl7e.com/wp-content/uploads/blog/31743560328_749ecff176_o-150x150.jpg)
